

This year I’ve been devoting one week a month to a themed blog series with daily blog posts. I’ve talked all about project life, shared some ‘wish someone told me sooner’ parenting advice, written about ways to preserve your memories/photos, revealed our favorite things in West Seattle, taught a few easy photo editing tips, celebrated my third birthday, shared ideas for documenting childhood, revealed my favorite apps, given ideas for fun ways to use your photos, dished about my family’s favorite recipes, and this month I’m sharing fun DIY photo gift ideas!
When I was brainstorming ideas for easy ways to use photos to MAKE gifts for the holidays, I immediately remembered a SUPER easy gift I made back in college. In those days I wasn’t a photographer by profession, but friends often designated me as THE photographer at our parties (mind you this was before we were taking photos on our cell phones… yup…) so I had a lot of photos and in a pre-social media world, often friends hadn’t seen them.
For Christmas one year, I saved up bottle caps (surprisingly easy to do in college), and culled through my photos. I made prints of everyone in my study abroad group and used a circle punch + hot glue to make bottle cap photo magnets. I gave everyone in the group a complete set of eight magnets (one head in each bottle cap). They were really cute, and appropriate for college memories.
Here’s my more-grown-up version of that EASY photo gift:
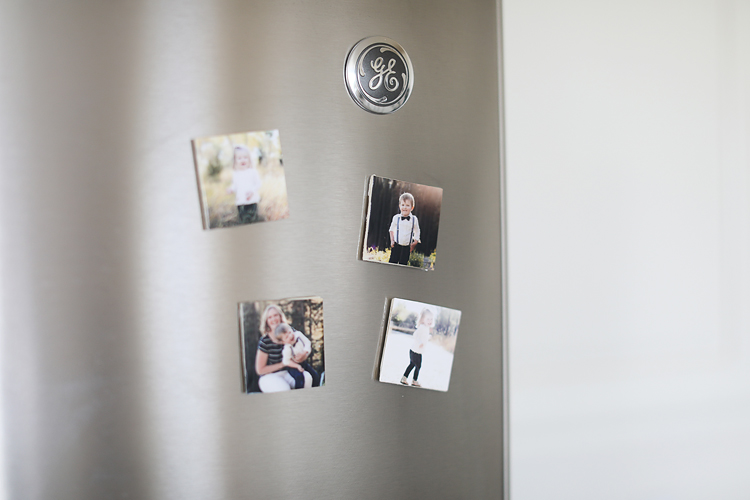
make your own photo magnets
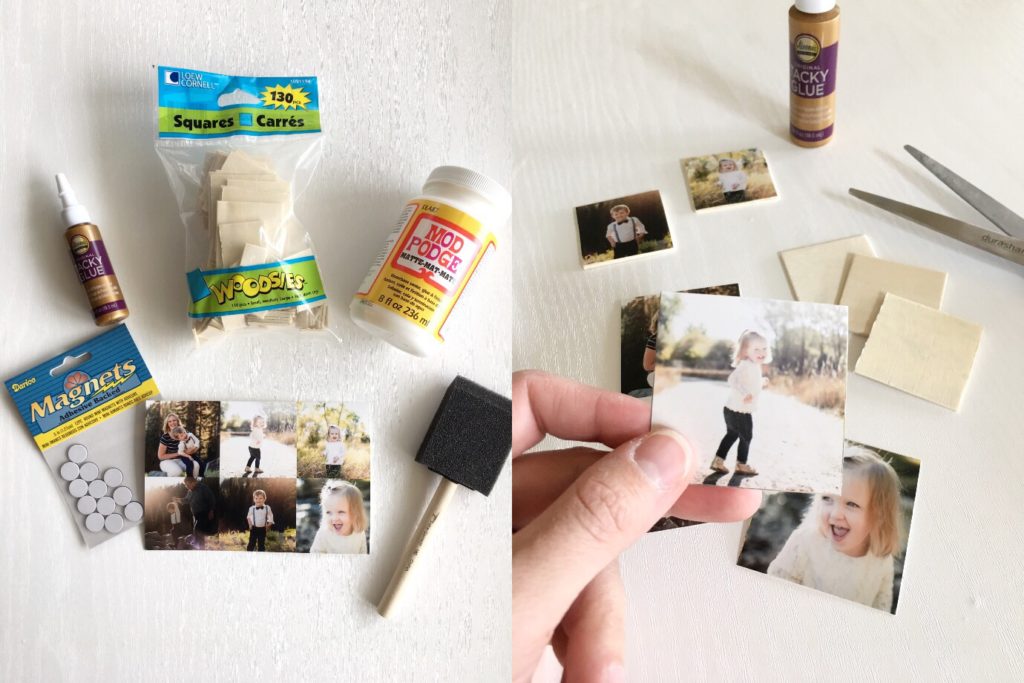
To make your own photo magnets, you’ll need: tiles, magnets, glue, and mod podge. And of course photos. You can purchase actual ceramic tiles at Home Depot, but I found these inexpensive ‘woodsies’ squares at Jo-Ann’s and they worked just fine.
how to make your own photo magnets:
- First, select your favorite photos and turn them into a photo collage. I used a free template in the Project Life App to put 6 square photos on a 4×6 print.
- Print your photos. I printed mine at Costco (see my photo quality comparison post to see why).
- Cut photos to fit wood square or ceramic tile (I used Woodsies Squares).
- Adhere photo to square (I used Tacky Glue).
- Apply a coat of Mod Podge to the entire square.
- After Mod Podge dries, glue a magnet on the back. (I used self adhesive magnets, but would recommend a regular magnet + hot glue for a better hold).
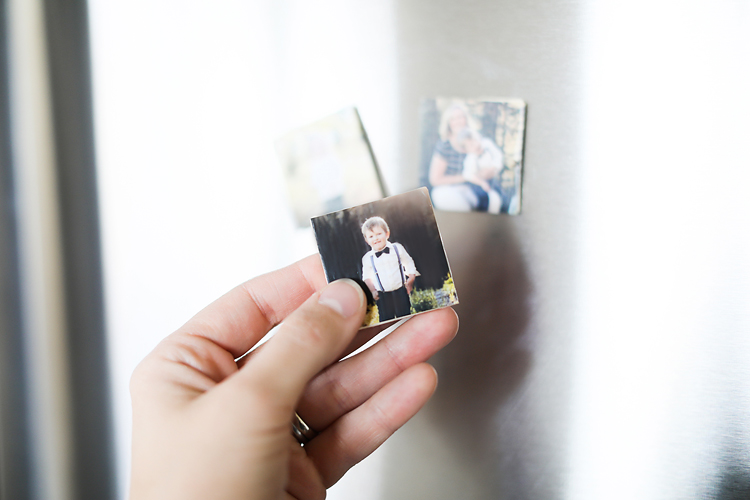
- Wrap up magnets for a friend.
- Smile… you just crossed something off your holiday gift list!
More fun DIY photo gift ideas are coming all week long! If you’d like to receive a summary in your email inbox at the end of the week, enter your email address here!


