My monthly ‘theme’ for May is random Mac tips + tricks (iPhone + computer) that you may never have used that will make your life EASIER! Today’s post is all about the Finder program on your Mac computer!

5 HELPFUL FINDER FEATURES
1. SETTING UP FINDER
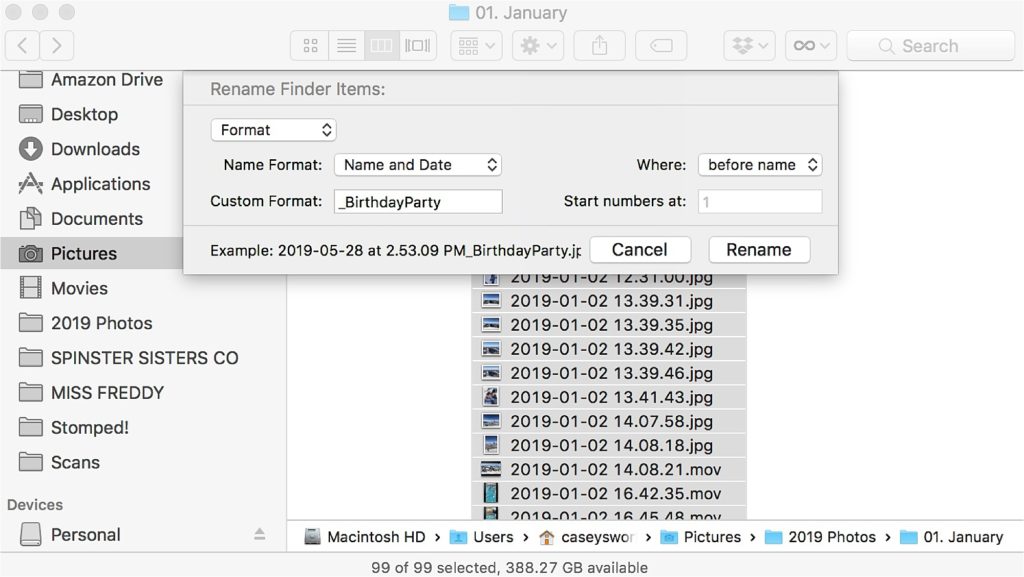
Let’s start with the basics. With a Finder window open, go to View and select ‘Show Path Bar’ and ‘Show Status Bar.’ These two additions can be enormously helpful, but aren’t turned on by default.
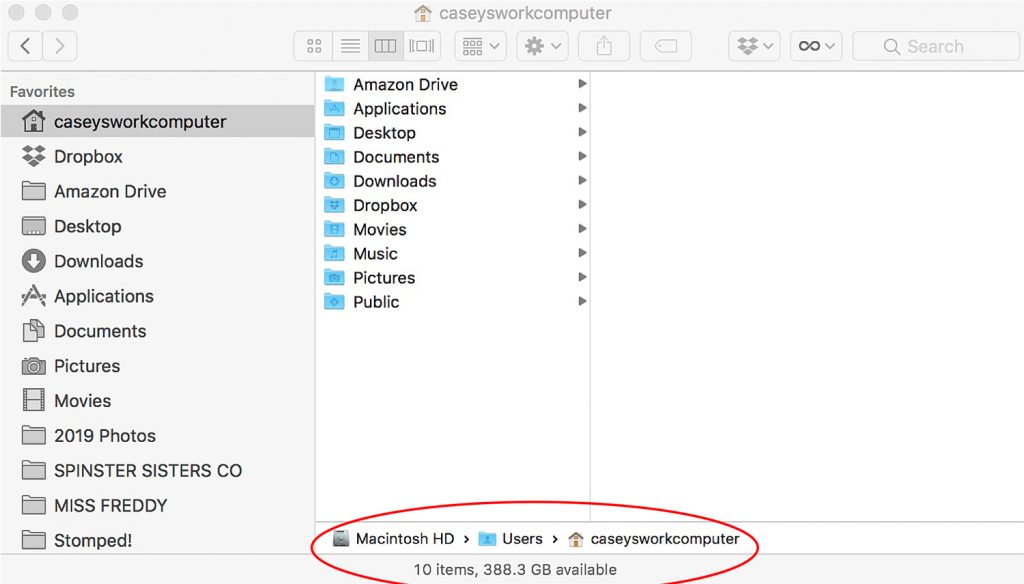
- The Path Bar allows you to quickly glance and see the file path of your item. Also, each of the folders are clickable so you can navigate quickly. I use this often to access the system folders that are otherwise hard to find- by double clicking on my username (in the photo above that’s caseysworkcomputer).
- The Status Bar shows you the number of files inside the current folder and also the remaining space available on your computer.
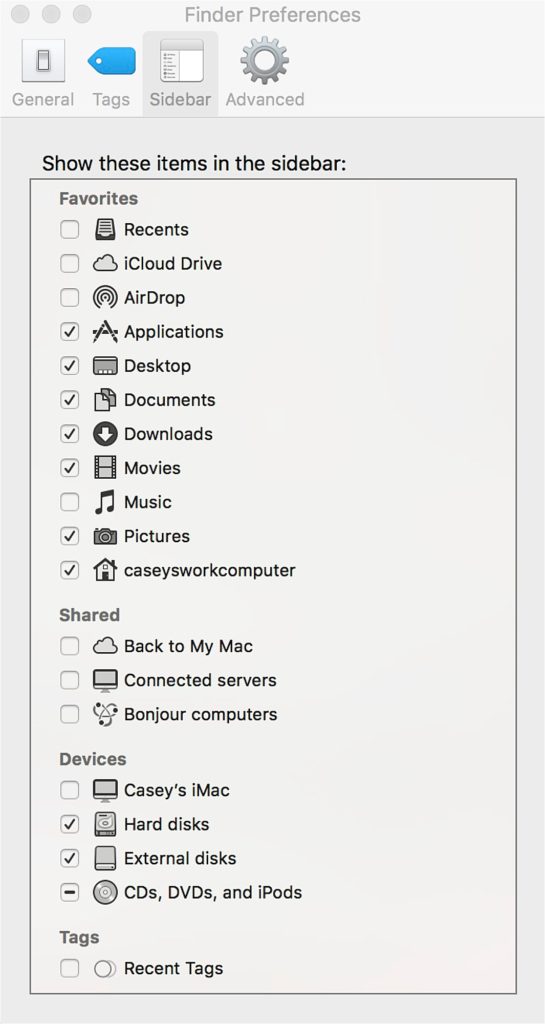
Finally, did you know there’s a default ‘Pictures’ folder on every Mac? It’s where your default Photos Library exists and also where many photos are saved, without you realizing it! Unfortunately, this Pictures folder isn’t always displayed in Finder, but you can turn it on in the Favorites list by going to Finder/Preferences/Sidebar.
2. CREATE FAVORITE SHORTCUTS
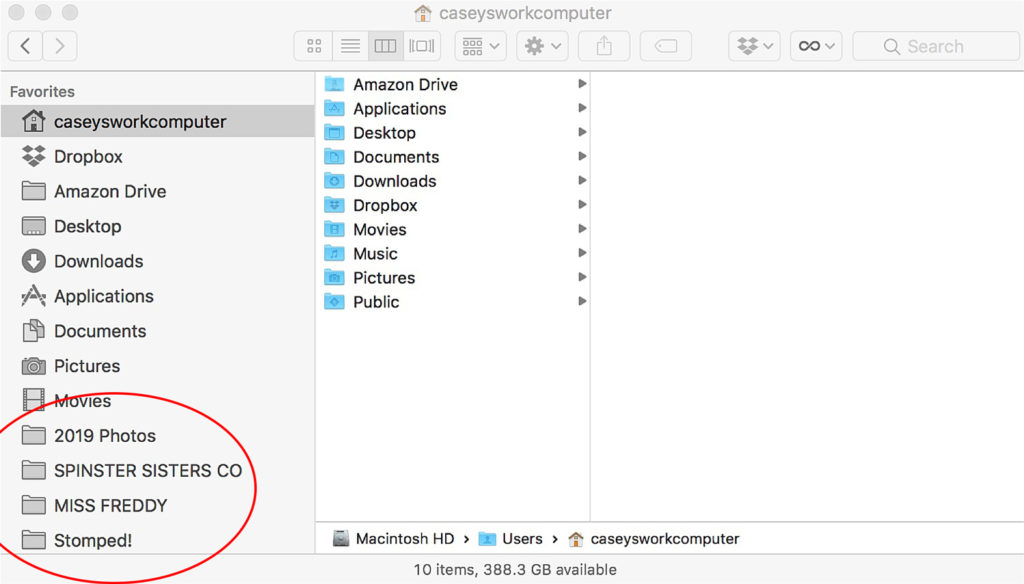
Now that you’ve setup the Basics in Finder, you can take it a step further and add Shortcuts into your Favorites list (on the left) by dragging a folder there. All of my frequently accessed folders are there so that I can get to them MUCH faster. These favorites also appear in Save screens inside various programs (like photoshop, pages, etc) so you can quickly select your favorite/frequent folders as destinations.
3. SEARCHING IN FINDER
Finder has some really, really helpful search capabilities. By typing ‘Command F’ within a Finder screen, the search functions will display. There are many, many ways to refine the search, but the one I use most frequently is to display ALL the contents within a master folder (including subfolder contents too). I set Kind as Any and add a second search criteria of Name matches “” which then returns EVERY single folder and file within the master folder/subfolders as its own line. You can select what you need and drag them into a new folder, delete them, etc. It’s also helpful to Sort by Type so I can see all the movies together, or the photos together, etc.
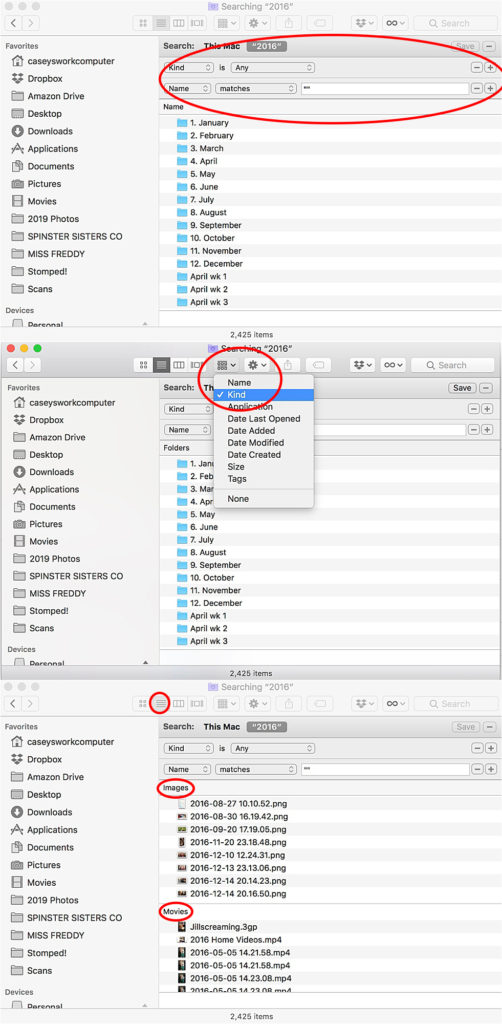
Bonus: that little ‘sort by Kind’ trick works in all Finder screens, not just the Find function. This comes in handy when I’m making annual video reels and need to grab all the VIDEOS from within my folders (I store photos + videos together). So easy!
4. BATCH RENAME
Did you know you can ‘batch rename’ files right within Finder? I’ll admit I much prefer to do this in Adobe Bridge, but if you haven’t made the leap over to Bridge yet, you can try this functionality! Select the files you want to rename, go to File/Rename X Files and choose your formatting from the options. Easy enough!
5. DRAG + DROP
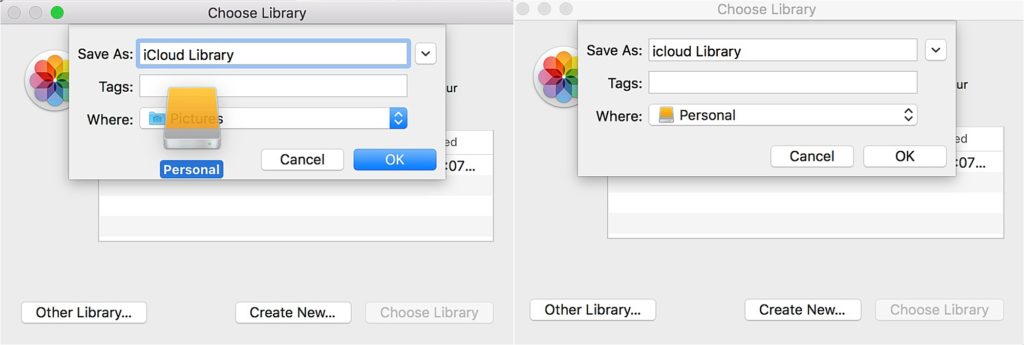
This is a really tiny tip, but it’s something I only recently discovered after many, many years of being a Mac user. Have you ever gone to save something and are only given a short list of possible destinations, none of which are the one you need? When a save screen displays like the one below, you can drag your desired folder destination right onto the ‘where’ field and it’ll automatically change!
That wraps up Mac Tips + Tricks month! Did you learn anything new?!
Missed a post? You can review the entire series here!