

Let me save you some money and frustration: you don’t need to get a new phone, you need to learn to use the one you have.
You can have the best camera in the world and still take terrible photos with it.
It’s not the camera. It’s knowing how to use it.
When you understand the basics, you don’t need 27 tries to get a good shot. Which means fewer decisions and way less overwhelm later.
five ways to take better iphone photos
1. Clean Your Lens (Seriously)
This is the most overlooked tip and it has a huge impact.
Your iPhone lives in your pocket, your bag, your car… it’s constantly collecting fingerprints, dust, and smudges. That soft, hazy look in your photos? It’s probably not lighting… it’s grime.
Before you take a photo, give your lens a quick wipe on your shirt.
That’s it. Instantly your photos look clearer and sharper.
2. Use the Right Lens (Stop Pinching to Zoom)
When you pinch to zoom, your phone is digitally zooming, which is a bit fuzzier. Instead, use the built-in lenses. The number and type of lenses will vary based on your iPhone model.
- 0.5x = ultra-wide
- 1x = standard
- 2x, 3x or 5x = telephoto (depending on your model)
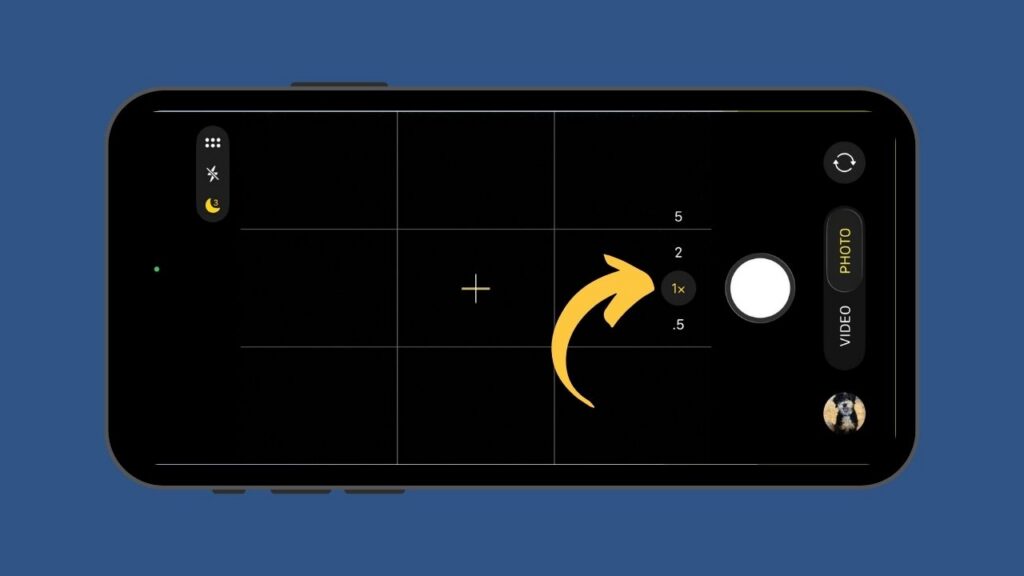
If you want to get closer, physically move your body when you can. If you can’t, switch to a telephoto lens instead of pinching.
This change will make your photos look sharper and more professional.
3. Tap to Control Exposure
Your iPhone is smart, but it doesn’t always guess lighting correctly. Before snapping a photo:
- Tap on your subject
- Then slide your finger up or down on the little sun icon to adjust brightness
Too dark? Brighten it slightly.
Too blown out? Bring it down.
This gives you control instead of leaving it up to the phone… and can make a big difference.
4. Use Portrait Mode (and Fix It Later if needed)
Portrait mode isn’t just for people… it works great for pets, food, and everyday moments too. It creates that soft, blurry background effect that makes your subject pop.
And here’s the part most people don’t know: you can adjust the focus after you take the photo.
If it focused on the wrong thing:
- Open the photo
- Tap “Edit”
- Tap the area you want in focus
You can also adjust how blurry the background with the ‘f’ slider at the bottom.
5. Pay Attention to What’s in the Background
Before you take the picture, take one second to scan the frame:
- Is there clutter behind your subject?
- Is something awkward “growing” out of someone’s head?
- Is there a distraction pulling your eye away?
Sometimes all it takes is:
- Taking one step to the side
- Lowering or raising your angle
- Moving a random object out of the frame
A cleaner background = a photo you’re more likely to share and print.
You don’t need to buy a new phone or camera… you need to learn how to take better photos with the one you already have.
- Clean lens
- Use the right lens
- Control your exposure
- Use portrait mode
- Be aware of your surroundings
None of this takes more than a few extra seconds, but it can change the quality of your photos more than buying a whole new phone!
You can visit the Apple Help website for more information about your iPhone model’s camera or find more iPhone tips in my blog archives!


