

If you’ve completed my Backup Bootcamp course or followed my steps for breaking up with Apple’s Photos program, then your photos are organized in simple folders on your desktop + backed up to the cloud (isn’t that glorious?!), but maybe you feel you’re missing a “viewer” to easily surf through those folders (Finder isn’t cutting it, right?).
I’ve always recommended Adobe Bridge because it’s free and I love it, but the program is not very ‘pretty’ and can feel overwhelming if you’re new to it. But, you’re in luck… I’ve discovered another solution for you!
You can actually setup Apple Photos in a way that reads your photos WHERE THEY ARE SAVED instead of the default where it moves your photos to reside in a mysterious ‘masters’ folder, hidden in the depths of your computer.
how to use apple photos without moving all your photo files
Before I share the simple steps, here’s the caveat: if you setup Apple Photos this way, iCloud will no longer sync between devices. (But if you have all your photos saved in another cloud program, then you don’t need iCloud anyway!)
Step 1:
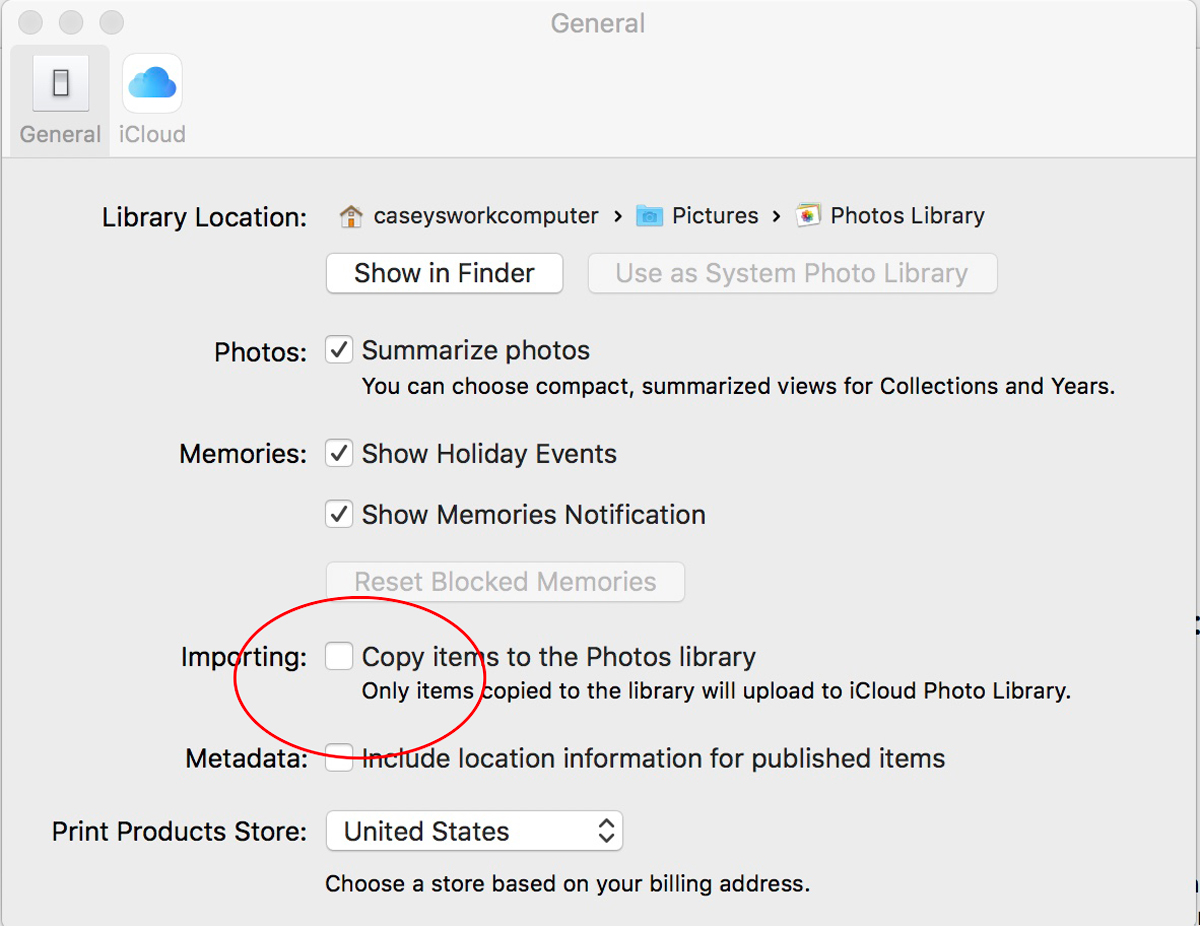
Open Apple Photos and select Photos/Preferences from the top left corner of your screen. Uncheck the ‘copy items to the Photos library’ option.
Step 2:
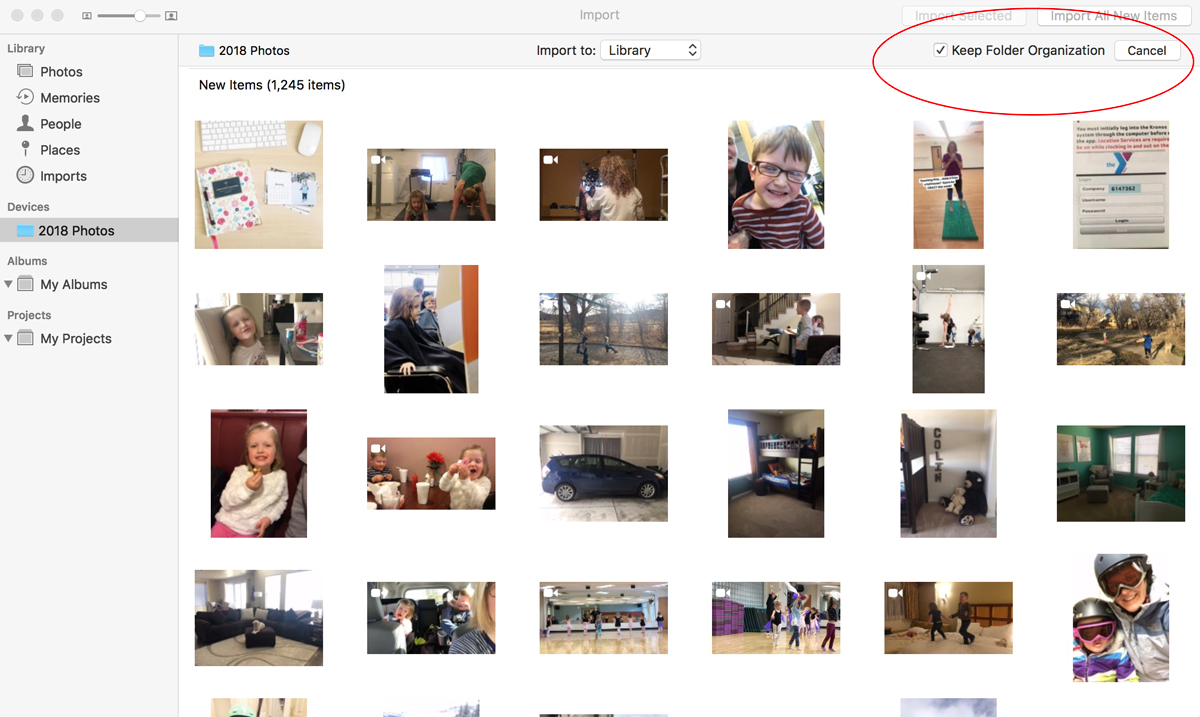
Go to File/Import and select the folder on your computer (or external hard drive) that contains all of your photos. Click ‘review for import.’
After all the photos load, make sure to check ‘keep folder organization’ and click ‘import all new items.’
Step 3:
That’s it! After the import is complete, you will find your folders all listed on the left side of the screen!
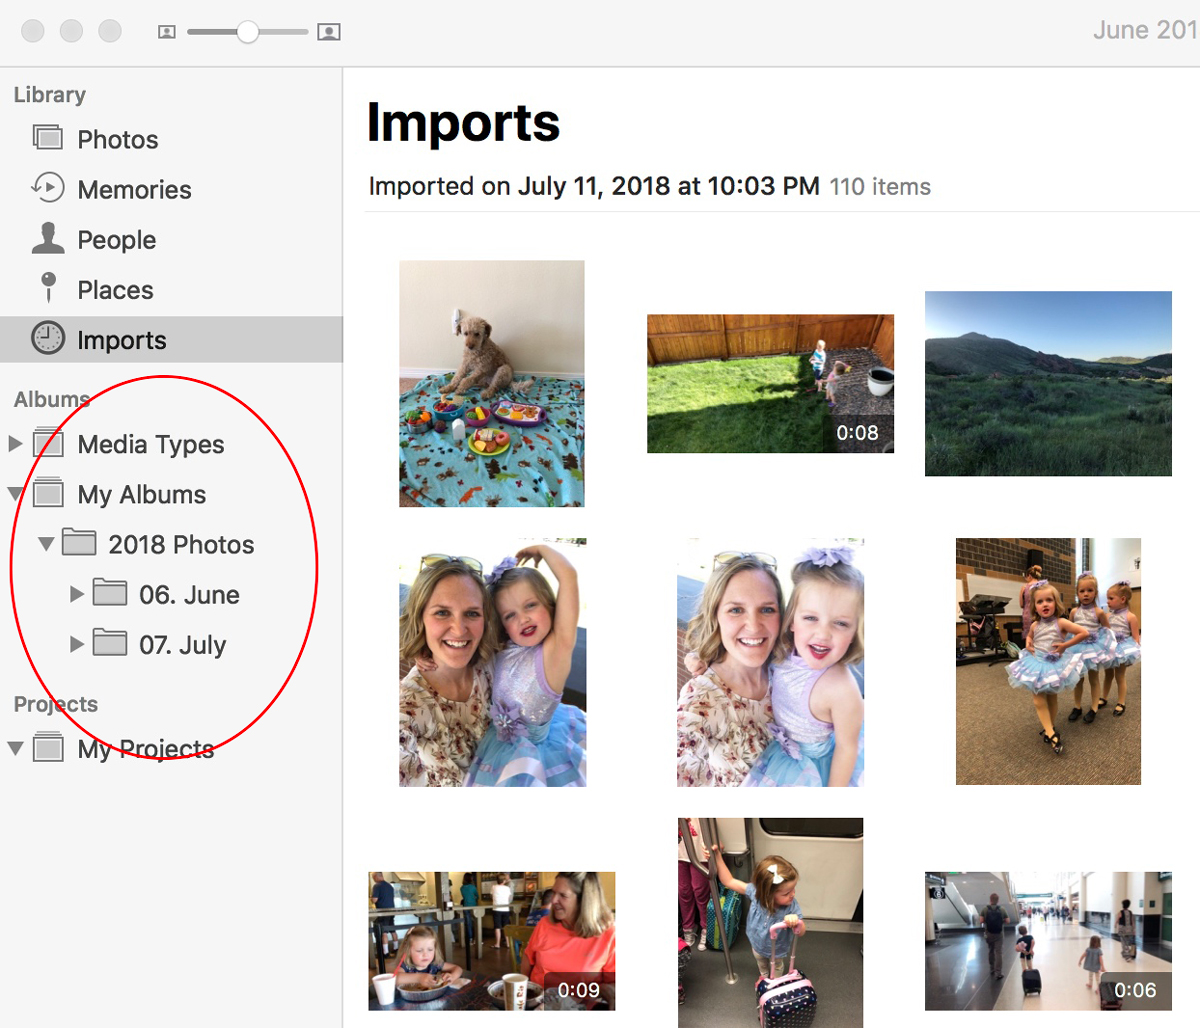
Now you can continue to use the search functionality + editing features of the Photos program without sacrificing control of your actual photo files. Isn’t that fun?!


