

This year I’ve been devoting one week a month to a themed blog series, with daily blog posts. I’ve talked all about project life, shared some ‘wish someone told me sooner’ parenting advice, written about ways to preserve your memories/photos, revealed our favorite things in West Seattle, and this week is ALL ABOUT PHOTO EDITING!
I’ve already covered my tips for editing on your phone, three super simple photoshop tricks to improve your blog photos and today I’m moving into a more intermediate concept: my process for editing skin in Photoshop while maintaining a natural look.
Before we jump into that, I need to get something off my chest: overly airbrushed/fake looking skin in photos is a pet peeve. There are currently a couple apps on the market that auto-smooth & tone your phone photos and if you’re new to editing, it’s tempting to over-do it. Friends, I love you, but when I see pics in my Instagram feed where the first thing I notice is the obviously altered skin, well… it’s not fooling anyone. There, I said it.
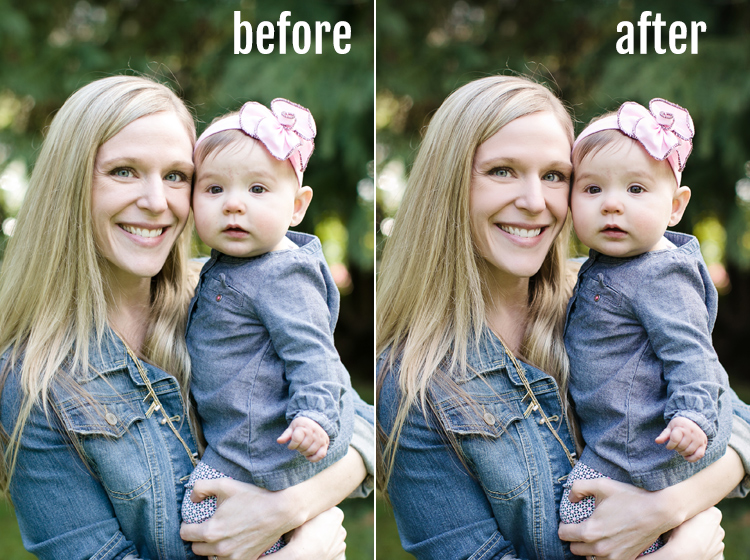
So, today I want to show you how I edit skin in Photoshop and focus, specifically, on making it look natural and not overly processed.
editing skin in photoshop
 [don’t miss the video tutorial at the end of this post!]
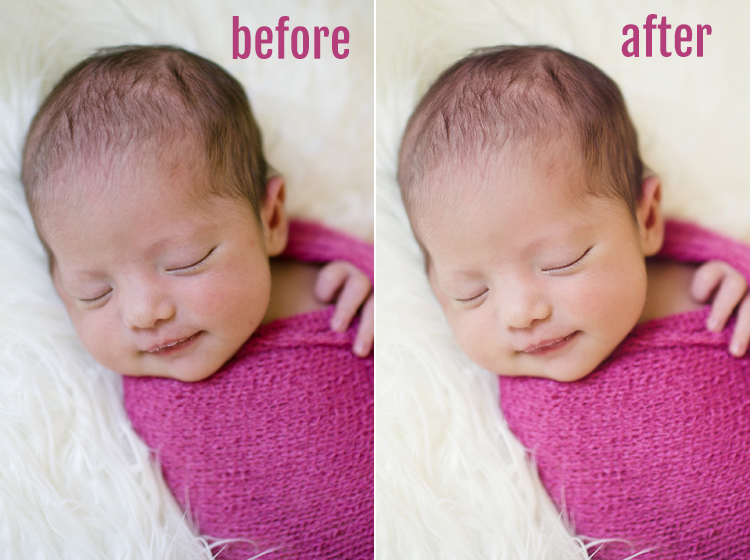
Step 1: Remove blemishes. I personally use the clone stamp for this step, but there are other ways. I option-click next to the blemish and then stamp over the top. Click, click done. This is how I removed the two very minor dots on the newborn cheek above.
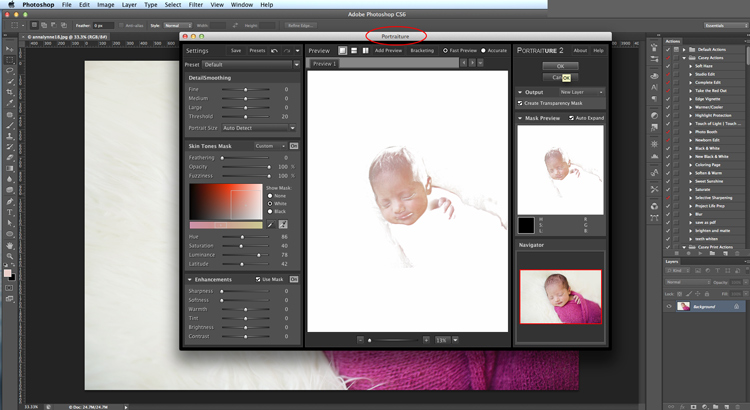
Step 2: Run the Portraiture plug-in. I know, I just cursed apps that ‘automatically’ smooth skin and now I’m sharing that I run Portraiture on EVERY photo I take. But, Portraiture is SO MUCH smarter than other apps. It doesn’t just make the skin blurry- it keeps some definition. [Note: the plug-in does have a significant expense, but after editing skin by hand for years, I found it pays for itself after a few sessions. Especially with newborns!]
Step 3: Brighten/soften the area under eye area using the paintbrush. I option-click an area next to the under eye wrinkle and then paint this color (at 20% opacity or less) over the wrinkle. DO NOT remove the wrinkle entirely or the eyes will look puffy and realllllly fake. (see below for an example)
editing skin in photoshop: video tutorial
See the edits in action!


